Introduction to Datapack Creation with Kore in Kotlin
Table of Contents
- Introduction to Datapack Creation with Kore in Kotlin
- Setting Up Kore in Kotlin
- Prerequisites
- Installation
- Creating a Datapack
- Generating the Datapack as a Zip File
- Changing Output Folder
- Adding Icon
- Creating your first function
- Managing Scoreboards with Kore
- Creating Scoreboards
- Creating Scoreboard Displays
- Limitations of Scoreboard Displays
- Going Further with Kore
- Custom Recipes
- Custom Advancements
- Custom Loot Tables
- Custom World Generation
- Tutorials
- Conclusion
Welcome to the world of Minecraft datapack creation! If you've ever dreamed of creating your own Minecraft datapack but thought you were limited to using just the traditional tools, we have exciting news for you. Kore, a Kotlin-based library, is here to revolutionize the way you develop datapacks for Minecraft.
Kore brings the power of Kotlin to the realm of Minecraft, allowing you to write cleaner, more maintainable code with less effort. Whether you're a seasoned developer or just starting out, Kore provides a set of tools that simplifies the process of datapack creation.
In this article, we'll introduce you to the basics of using Kore to create your very own Minecraft datapack. You'll learn how to set up your environment, define your datapack's properties, and manage scoreboards, all within the comfort of Kotlin's modern syntax.
Setting Up Kore in Kotlin
To get started with creating Minecraft datapacks using Kore in Kotlin, you'll need to set up your development environment. This process is straightforward and will allow you to harness the power of Kotlin for your Minecraft projects.
Prerequisites
Before you begin, ensure you have the following installed:
- Java Development Kit (JDK) 21 or later
- IntelliJ IDEA or any preferred IDE that supports Kotlin
- Gradle 9.5 or later
- Kotlin 2.2 or later (required for context parameters)
Installation
-
Create a new Kotlin project in your IDE.
-
Add Kore as a dependency to your project. For Minecraft 1.21.11, use a
2.0.x-1.21.11version (or the latest one matching your game version).implementation("io.github.ayfri.kore:kore:VERSION") -
Activate the Context Parameters compiler option.
kotlin { compilerOptions { freeCompilerArgs.add("-Xcontext-parameters") } } -
Target Java 21 or higher with the Kotlin toolchain.
kotlin {
    jvmToolchain(21)
}
Creating a Datapack
Creating a datapack is a fantastic way to add new content to Minecraft, and with Kore, it's easier than ever.
val myDatapack = dataPack("my_datapack")
myDatapack.generate() // generates datapack in "out" folder
As you can see, creating a datapack is as simple as calling the dataPack function and passing in the name of your datapack. Let's dive into how you can customize your datapack by changing its output folder and adding an icon.
Generating the Datapack as a Zip File
If you want to generate your datapack as a zip file, you can use the generateZip function:
val myDatapack = dataPack("my_datapack")
myDatapack.generateZip() // generates datapack as a zip file in "out" folder
Changing Output Folder
By default, datapacks are saved in an out folder, but you might want to change this to organize your projects better or to work directly within a Minecraft world. Here's how you can specify a new output folder for your datapack:
dataPack("my_datapack") {
	path = Path("%appdata%/.minecraft/saves/my_world/datapacks")
}
This code sets the output folder to the datapacks directory of my_world in your .minecraft saves folder. Remember to replace my_world with the name of your world.
Adding Icon
An icon adds a professional touch to your datapack and helps users identify it easily. Here's a simple way to set an icon for your datapack:
dataPack("my_datapack") {
	iconPath = Path("icon.png")
}
Place your icon.png file in the root of your datapack directory, and this code will link it as the icon for your datapack.
Here's an example of what your datapack will look like in-game with an icon:
![]()
Creating your first function
Now that we've set up our environment and defined our datapack, let's create our first function. Here's how you can create a function:
dataPack("my_datapack") {
	function("my_function") {
		say("Hello, world!")
	}
}
This code creates a function named my_function that prints "Hello, world!" in the chat. Let's break down what's happening here:
- The
dataPackfunction creates a new datapack with the name "my_datapack". - The
functionfunction creates a new function named "my_function" within the datapack. - The
sayfunction uses the/saycommand to print "Hello, world!" in the chat.
All of Minecraft commands are available as functions in Kore, so you can use them directly in your code. This makes it easy to create functions that perform a variety of tasks, from printing messages to teleporting players.
For example, you could create a function that teleports every creeper to the player's location:
dataPack("my_datapack") {
	function("teleport_creeper") {
		execute {
			asTarget(allEntities { type = Entities.CREEPER })
			run {
				teleport(nearestPlayer())
			}
		}
	}
}
Managing Scoreboards with Kore
Now that we've seen how to create a datapack and functions, let's explore more advanced features of Kore. In this section, we'll learn how to manage scoreboards using Kore, including adding objectives and creating scoreboard displays.
Scoreboards are a powerful feature in Minecraft that allow you to keep track of player scores, objectives, and other game events. With Kore, managing scoreboards becomes a seamless experience, leveraging Kotlin's concise syntax. Let's dive into how you can create and manage scoreboards using Kore.
Creating Scoreboards
To create a scoreboard in Kore, you can use the scoreboard command. Here's a simple example of how to add an objective to your scoreboard:
scoreboard {
	objectives.add("my_objective", ScoreboardCriteria.DUMMY)
}
This code snippet creates a new objective named "my_objective" with a criterion type of DUMMY, which is useful for objectives that are manually updated by commands or plugins.
Creating Scoreboard Displays
Creating a display for your scoreboard objectives is straightforward. Here's how you can set up a display name, display slot, and render type for your objective:
scoreboard {
	objective("my_objective") {
		add(ScoreboardCriteria.DUMMY, displayName = textComponent("My Objective", Color.GOLD))
		setRenderType(RenderType.INTEGER)
		setDisplaySlot(DisplaySlots.sidebar)
	}
}
In this example, we're adding an objective with a golden display name "My Objective". We then set the display slot to the sidebar and specify that the scores should be rendered as integers.
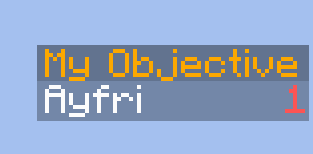
Here's what the traditional scoreboard command would look like for this example:
scoreboard objectives add my_objective dummy "My Objective"
scoreboard objectives modify my_objective displayname {"text":"My Objective","color":"gold"}
scoreboard objectives modify my_objective rendertype integer
scoreboard objectives setdisplay sidebar my_objective
As you can see, Kore's Kotlin-based syntax is much more concise and readable than the traditional command syntax. Using Kotlin's features, we can extend any of these commands to simplify the process even further. For example, we can create a function that adds an objective and sets the display slot and render type:
import io.github.ayfri.kore.commands.scoreboard.Scoreboard

fun Scoreboard.objective(
	name: String,
	criteria: ScoreboardCriteria,
	displayName: TextComponent,
	displaySlot: DisplaySlots,
	renderType: RenderType
) {
	objectives.add(name, criteria, displayName)
	objective(name) {
		setDisplaySlot(displaySlot)
		setRenderType(renderType)
	}
}

// usage
scoreboard.objective(
	"my_objective",
	ScoreboardCriteria.DUMMY,
	textComponent("My Objective", Color.GOLD),
	DisplaySlots.sidebar,
	RenderType.INTEGER
)
Limitations of Scoreboard Displays
While scoreboards are versatile, it's important to note that there are some limitations to their displays:
- Scoreboard displays are the same for all players; you can’t have individual displays for each player.
- You can differentiate displays by team color, but that's the extent of customization in that regard.
- There's a limit of 15 lines in a display.
By mastering these scoreboard management techniques with Kore, you can enhance your Minecraft datapacks with dynamic and interactive elements. For more detailed information and advanced usage, check out the Kore documentation on Scoreboards.
Going Further with Kore
Now that you have a solid foundation for creating datapacks with Kore, you may be wondering - what's next? How can I take my datapacks to the next level? Here are some ideas for going further with Kore:
Custom Recipes
Kore enables the creation of recipes beyond the standard options in vanilla Minecraft, such as specialized recipes for blasting and smoking. The recipe documentation covers how to customize ingredients, results, shapeless recipes, shaped recipes, and more.
dataPack("my_datapack") {
	recipes {
		craftingShapeless("my_recipe") {
			ingredient(Items.DIAMOND)
			// One ingredient() call per slot. Passing several items to a single call
			// means "any of these" for that slot, not a quantity.
			ingredient(Items.GOLD_INGOT)
			ingredient(Items.GOLD_INGOT)
			result(Items.DIAMOND_SWORD)
		}
	}
}
Custom Advancements
With Kore, all aspects of advancements can be customized like icons, frames, titles, descriptions, criteria and triggers. Players can be rewarded for any achievement with things like experience and loot tables. See the advancement documentation for more details.
dataPack("my_datapack") {
	advancement("my_advancement") {
		display(Items.DIAMOND_SWORD, title = "My Advancement", description = "This is my advancement!") {
			frame = AdvancementFrameType.GOAL
		}

		parent = Advancements.Story.ROOT

		criteria {
			consumeItem("my_criterion") {
				item {
					items = listOf(Items.ENCHANTED_GOLDEN_APPLE)
				}
				conditions {
					randomChance(0.5f)
				}
			}
		}

		rewards {
			experience = 10
			function = FunctionArgument(namespace = "my_datapack", function = "my_function")

			loot = listOf(LootTables.Chests.DESERT_PYRAMID)
		}
	}
}
Custom Loot Tables
Kore's loot table system provides control over when and how items are generated from events like block breaking and mob drops. The number of rolls, item pools, and loot conditions are configurable. Refer to the loot table documentation for more information.
dataPack("my_datapack") {
	lootTable("diamond_ore") {
		type = LootTableType.BLOCK

		pool {
			rolls = uniform(1f, 3f)

			conditions {
				weatherCheck(true)
			}

			entries {
				lootTable(LootTables.Gameplay.PIGLIN_BARTERING)
			}
		}
	}
}
Custom World Generation
By integrating external libraries, Kore enables fully customized world generation. Unique overworlds, nether worlds, end worlds and more can be procedurally created from scratch with custom terrain, structures and features. See the world generation documentation for possibilities.
dataPack("my_datapack") {
	dimension("my_flat_nether_dimension", type = DimensionTypes.THE_NETHER) {
		flatGenerator(biome = Biomes.NETHER_WASTES) {
			features = true
			structureOverrides = listOf(StructureSets.NETHER_COMPLEXES)

			layer(Blocks.NETHERRACK, 1)
			layer(Blocks.LAVA, 2)
			layer(Blocks.NETHERRACK, 10)
		}
	}
}
Tutorials
For more in-depth tutorials on creating Minecraft datapacks with Kore, check out the following articles:
Conclusion
In this article, we've explored the basics of creating Minecraft datapacks with the Kore library in Kotlin. We've seen how Kore simplifies the process, allowing you to define datapacks and manage scoreboards with ease. By leveraging Kotlin's concise syntax and Kore's straightforward API, you can create complex datapacks without getting bogged down in the details.
Here's a quick recap of what we covered:
- We set up Kore in a Kotlin project, readying our environment for datapack development.
- We learned how to define a datapack, change its output folder, and add an icon to personalize it.
- We explored how to create and manage scoreboards using Kore, including adding objectives and creating scoreboard displays.
Kore is a powerful tool that opens up a world of possibilities for Minecraft modding with Kotlin. Whether you're a seasoned developer or new to the scene, Kore provides an accessible platform to bring your creative visions to life.
It is also updated regularly, and compatible since Minecraft 1.20.1. Each new version of Minecraft (including snapshots) is supported as soon as possible.
For more detailed information and advanced features, be sure to check out the Kore documentation and explore the Kore repository on GitHub.
We hope this article has inspired you to start using Kore for your Minecraft projects. Happy coding!